024: How to Create Multiple ConvertKit Forms on My Squarespace Page?
Hello there, my friend!
This is one of my first hurdles that I faced in Spring 2016 while setting up ConvertKit forms on my personal development website. I wanted to add three different ConvertKit forms to my homepage, each with a unique free download (also called content upgrade or lead magnet). Eventually I figured it out and have been wanting to make a video tutorial to show you as well.
Then, today in the ConvertKit Family Facebook, this question came up again:
".... I am creating a Resource page with different content upgrades... I'd LOVE for the ConvertKit form to pop-up on a button click...Has anyone does this?"
So I took that as my cue to create a video tutorial showing you how to have three different ConvertKit form pop up from a button on the same page AND do this without Zapier.
Yes, you heard that right! Without using Zapier!
Here's a video showing you step-by-step. But below you can also see an outline of all the steps:
Step 1:
Create your resource page with the three Content Upgrades (or more if you like)
It can look something like this:

Step 2:
Add the following piece of code under Design-> CSS on your Squarespace account:
/* CTA Button */
#cta-button-container {
text-align: center !important;
line-height: 3em;
margin-top: 30px;
margin-bottom: 30px;
}
#cta-button {
text-align: center !important;
background-color: #111111;
padding: 10px 15px;
padding-right: 15px !important;
color: #fff;
font-size: 14px;
text-transform: uppercase;
letter-spacing: 2px;
font-weight: 600;
display: inline-block;
}
#cta-button:hover {
background-color: #111111;
border: 2px #111111 solid;
color: #fff;
}
Step 3:
Customize the button colors above to match your brand color. You will see the color codes that I've made bold above. This is what you will need to change. To find out your button color code, go into Design and look for the button color there.
Step 4:
Create 3 different ConvertKit Forms. Make sure you have customized them (with the right freebie, tag/automation, sequence and so on). Make sure all three ConvertKit Forms you are using are MODAL forms.
All three of them must be MODAL forms. This is because you want them to popup from a button. (Modal means they will pop-up while inline means they stay on the page).
Like this in the picture below:
Step 5:
Add this bit of code under each content upgrade on your Squarespace page:
<div class="sqs-block-button-container--center"
id="cta-button-container">
<a rel="ck_modal" href="#ck_modal"
class="sqs-block-button-element--medium sqs-block-button-element" id="cta-button">
Download Here!
</a>
</div>
<p style="clear:both;">
</p>
So in other words, you will place the above code under each of the images on your resource page so it should visually look like this:

Step 6: Add the three ConvertKit Form Codes individually
Now we will make grab code from the three different ConvertKit forms and place them very delicately. Please watch the video if my text here is not making sense. Sometimes showing these things is easier than explaining in words for me.
Step 6.1: Resource # 1 - the First ConvertKit Form
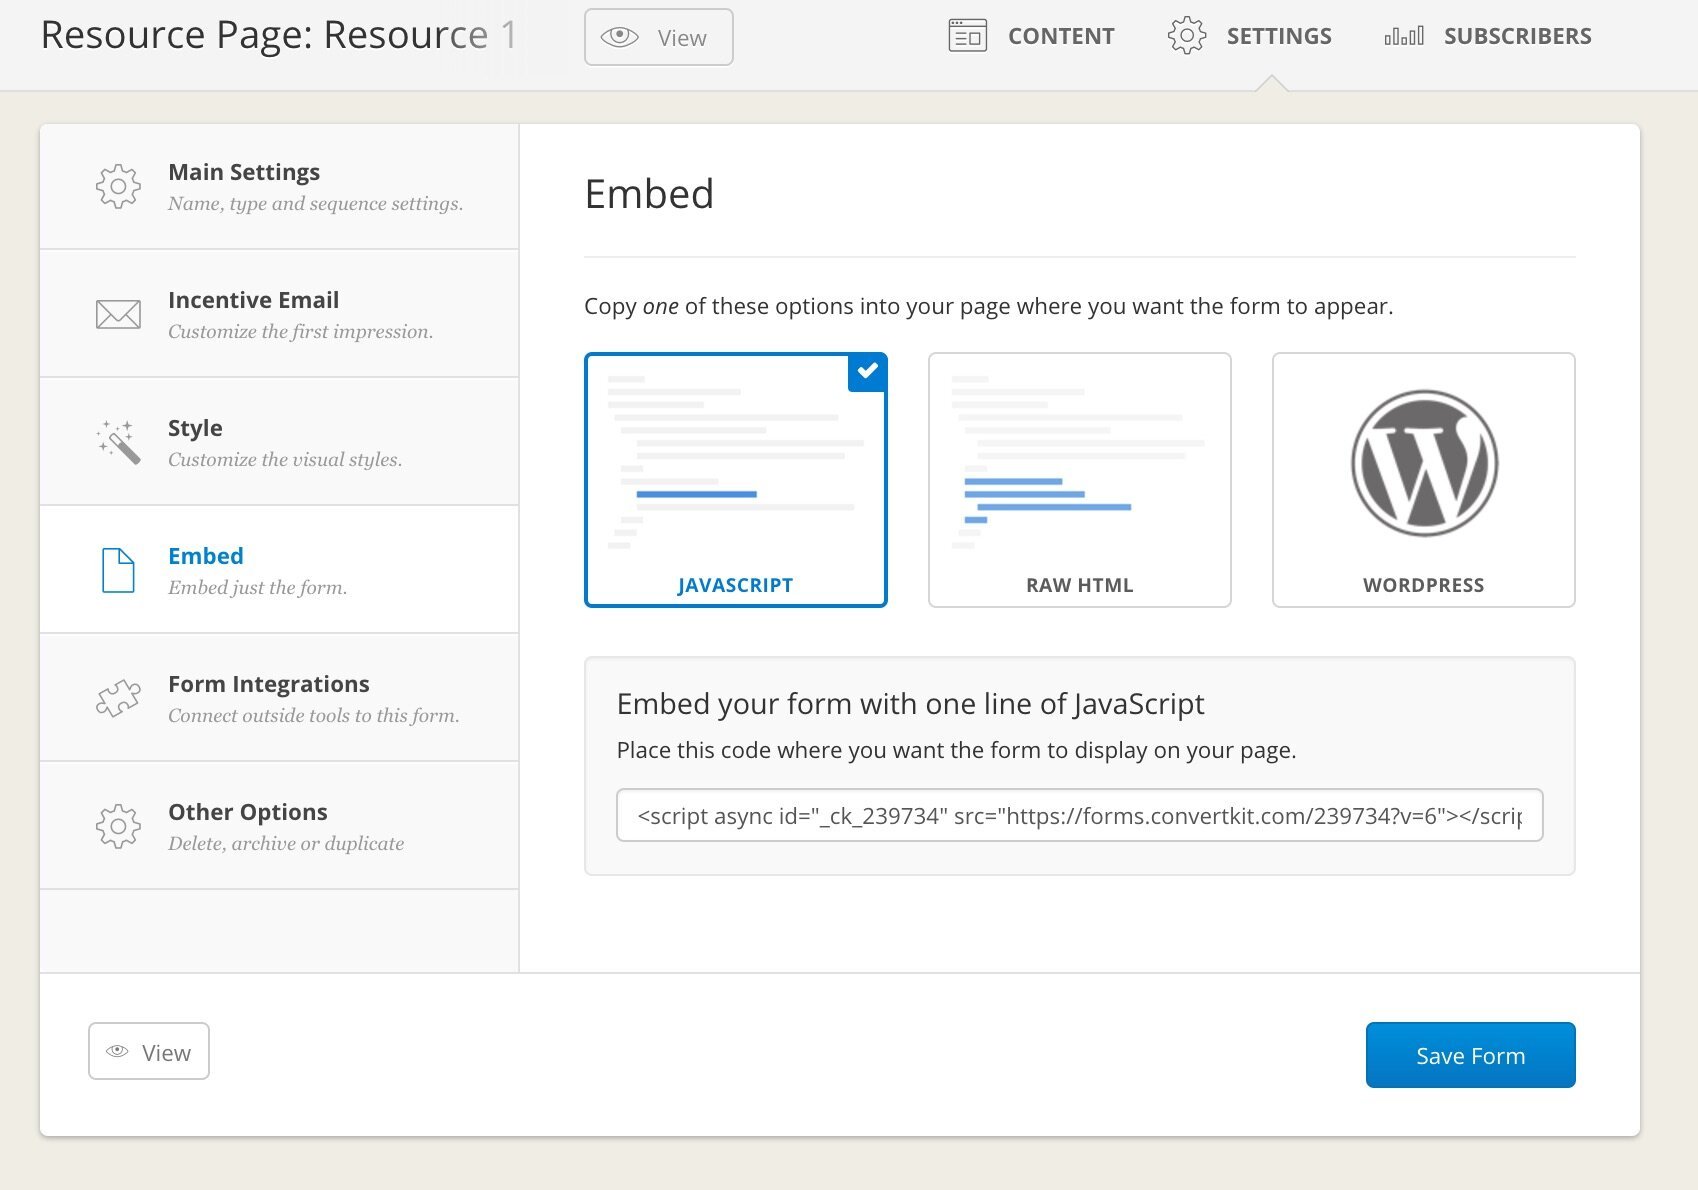
Just copy the Java script and place it above the existing code. That's it. This is the easiest. You get that from EMBED section of your Form:
Step 6.2: Resource # 2 - the Second ConvertKit Form
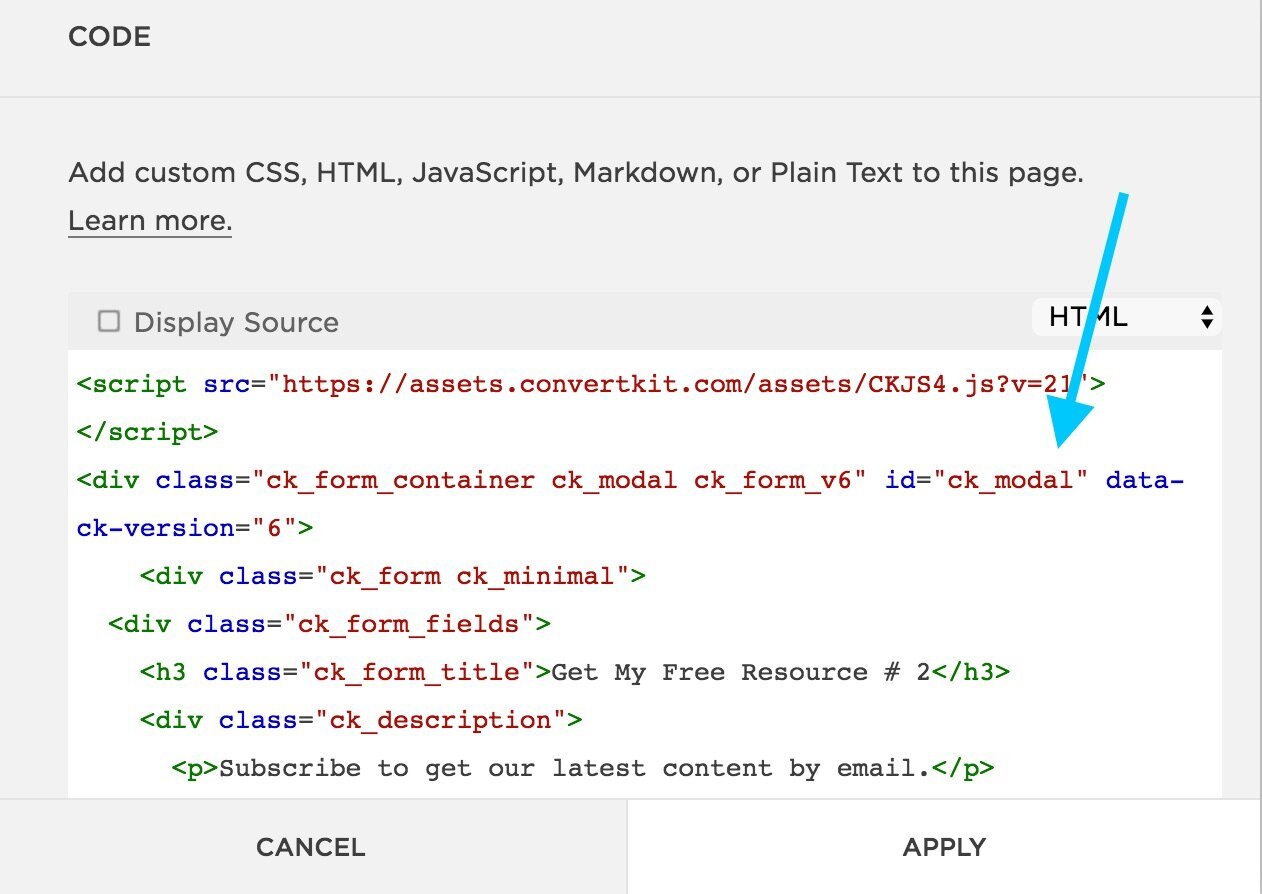
For the second and the third ConvertKit Forms, you will grab the HTML code. You will also get that from EMBED section of your Form. But instead of Javascript, click on HTML.
Just copy all the HTML code and place it on your squarespace page where you already have some code in the code block. See the image below for a visual reference.

Step 6.3: Resource # 3 - the Third ConvertKit Form
Do exactly the same thing as in Step 6.2 for the third ConvertKit Form.
Just copy all the HTML code and place it on your squarespace page where you already have some code in the code block.
Step 7: Customize the Second and Third ConvertKit Form
Now this is where you will need to pull up your detail-oriented, laser-focus. Because now we will go into the Raw HTML that we just posted in the second and the third resource form, and customize it.
You are now doing this inside the code block on squarespace. This is where I will be making the corrections to the code.

Okay so now, you will change three parts in the code:
rel
href
id
Follow the steps below to see what I mean. (Watch video above if that is easier to follow).
Step 7.1 Let's start with Form No. 2
In simple words, what we want to do is to give a suffix to the modal forms so that Squarespace can tell the difference from one form to the other. This suffix will be added at the end in the three places. And it can be any term as long as it is the same in the three places.
First find this bit of code at the very top. You are looking for the form id. Then add any suffix you like. In my case I am adding "treehouse".
This is the code before
This is the code with the suffix added
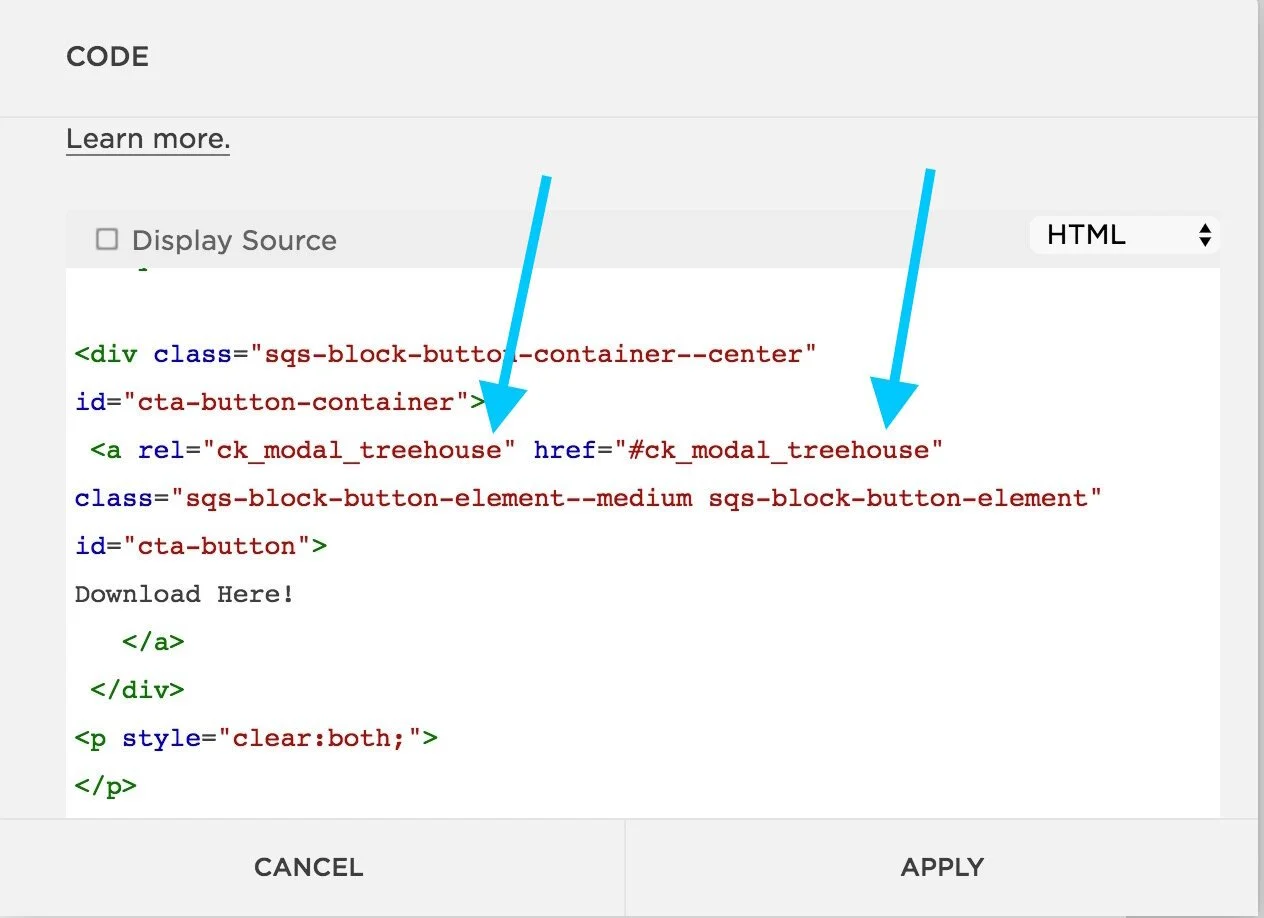
Now scroll to the very very bottom. Find <a rel="ck_modal" href="#ck_modal"
And also add the same suffix there.
This is the code before

This is the code with the suffix added
Step 7.2 Make sure to do the same actions in Step 7.1 for the third convertKit form. Just make sure you use a suffix that is different than what you used in the second form. I used "bigcat" for my third form - just because!
Step 8: Test!
Now make sure to test everything. There are a lot of pieces to this, so don't worry if it is not working the first time. There may be a tiny detail that you need to tweak and you will get it.
If after testing it and trying it out, you still can't seem to make it work, just drop me a line in the comments. I will be happy to help troubleshoot - my gift to you.
I want to thank my colleague Melissa Thorpe who taught me a huge part of the multiple optin form process and I also thanks Tors Grantham for teaching me how to make the button pop-up on Squarespace. You see, we are all constantly being helped! THank you for watching/reading this blog and be sure to share it.
PS: This blog post can be freely shared on social media. If you'd like to share it to with your readers inside a paid platform as a resource - please drop me an email to see what to write in giving credit!
